Kingroot PC

download (1)

Why Root Your ANdroid Device With KingRoot PC

How To Root Almost All Android Devices With KingRoot PC

KingRoot PC is an Android Rooting Software that will let you root your Android device To proceed this rooting tool need external support as PC and USB cable. Anyway,KingRoot PC brings your in Chinese language why original version kingroot design in Chinese language.
Furthermore,Kingroot PC is also most user friendly Android Rooting tool so operation is so simple.
First Download KingRoot PC version on you PC,Enable USB debugging Mode,connect your Android Device via USB cable and Click on the blue button to proceed the root.Wait several minutes to proceed the Rooting.Finally you can get results as success.

KingRoot PC is most great,trusted and most clever Android Rooting tool to root your android device.

To before use the King Root PC,you can read most best tutorial and King Root supported Android Devices list why it will be helped you to gained success easily.


How To Install Custom ROM on Android

images (7)

Custom ROM includes firmware which it is similar to the Stock ROM but Custom ROM is 3rd part design by Developer.Understand,Purpose of  Stock and Custom are similar which both are brought android Operating System.Anyway manufacturer adds so many useless bloatware for the Stock ROM as business strategy but Custom ROM is included only OS.So usages of Custom ROMs are  easier and productive than Stock ROM.Anyway,i have mentioned before,Custom ROM is not included any bloatware.So Custom ROM will expand your Battery Life,you can achieve high performance and you can get latest updates before forward the manufacturer.

Okay,any android user need to reap the many benefits  of custom ROM when you should replace the Custom ROM instead of the Stock ROM  runs on your android device which it is called as Flashing a Custom ROM.

Pre-Requirement before Install the Custom ROM.

  • Get All Backup on your Android Device.If you need to know how to get Backup on your Android Device when you can use this link here.
  • Charge your Android Device well
  • Unlocked bootloader
  • Custom Recovery
  • GApps
  • Custom ROM-Deside and select suitable Custom ROM to your Android Device.Anyway,you should find compatibility selected Custom ROM and your Android Device before begin the flash the Custom ROM.Many phones have several variants.So varies Android Devices  require different ROMs. So make sure that you are getting the correct ROM, by verifying that it’s compatible with your phone model.Do you know about best Android Custom ROM for 2018?


Steps To Install Custom ROM

Step 1: Download a ROM

Find a ROM for your Android  device. Make sure you download is  right one for your device.

image09

After you have downloaded the required Custom ROM as Zip File,then you don’t extract it and just find the corresponding GApps.Understand,you should select suitable GApps which it is compatible for runing Android version.As example,If you are installing a ROM running on 4.4.2, you’ll want a GApps package for 4.4.2. Save your ROM and GApps to your SD card, internal storage, or flash drive.

2.Boot into Recovery


You can boot into recovery on your android device by using recovery combo buttons. If you don’t know which buttons to press, to access recovery, see this guide. On most devices it is Hold Vol Down + Power for 5 seconds. Once you are in recovery, you can see something as below,

3.Flash ROM

Now,you should move ahead & select “Install”

Install on TWRP

Once you have selected your ROM file.You should proceed to flash the zip


Apply update in TWRP
Flash the file with TWRP

4. Clear Cache

After the installation has  completed,you can back out and clear your cache easily.

Wipe with TWRP

Mentioned Method is the most common way to flash a ROM,but there are many different ways specific to each Android device. Here list a few of the most common pieces of software that offer you to flash a ROM from your PC/Laptop. These are better to use when you’re flashing the stock ROM back onto your device.

Read More-

What is a Custom Recovery? Exploring CMW & TWRP

How to install Custom ROMs for your Android

List of Android 8.0 Oreo Custom ROMs for Popular Devices – Find Your Update!

Top Best Custom ROMs For LG G6 |Download

Top Best 12 Custom ROMs Must Try In 2018


How To Root Motorola DROID Turbo Android Smartphone

motorola-droid-turbo-6738

Motorola DROID Turbo is a quality Android Smartphone, which brings with 5.2 inches touchscreen display powered by 2.7 GHz Quad-core processor along with 1.5 GB RAM and the device runs on Android Android V 6.0 (Marshmallow) operating system.

If you are an owner of  Motorola DROID Turbo and hoping to root it, you are on the right page as I have given a step by step tutorial to root Motorola DROID Turbo here.

If you follow the given instructions then you will be able to root Motorola DROID Turbo successfully. After you have gained root privileges on your device, you will be able to install custom recovery images, flash custom ROM firmware files, etc.

PREREQUISITES:

1) Get all backup on your Android Device.You can use any appropriate backup tool to do it easily and correctly.

2) Ensure that your device has at least 50-60% battery backup.

3) Enable USB Debugging or Android Debugging on your device  as below,

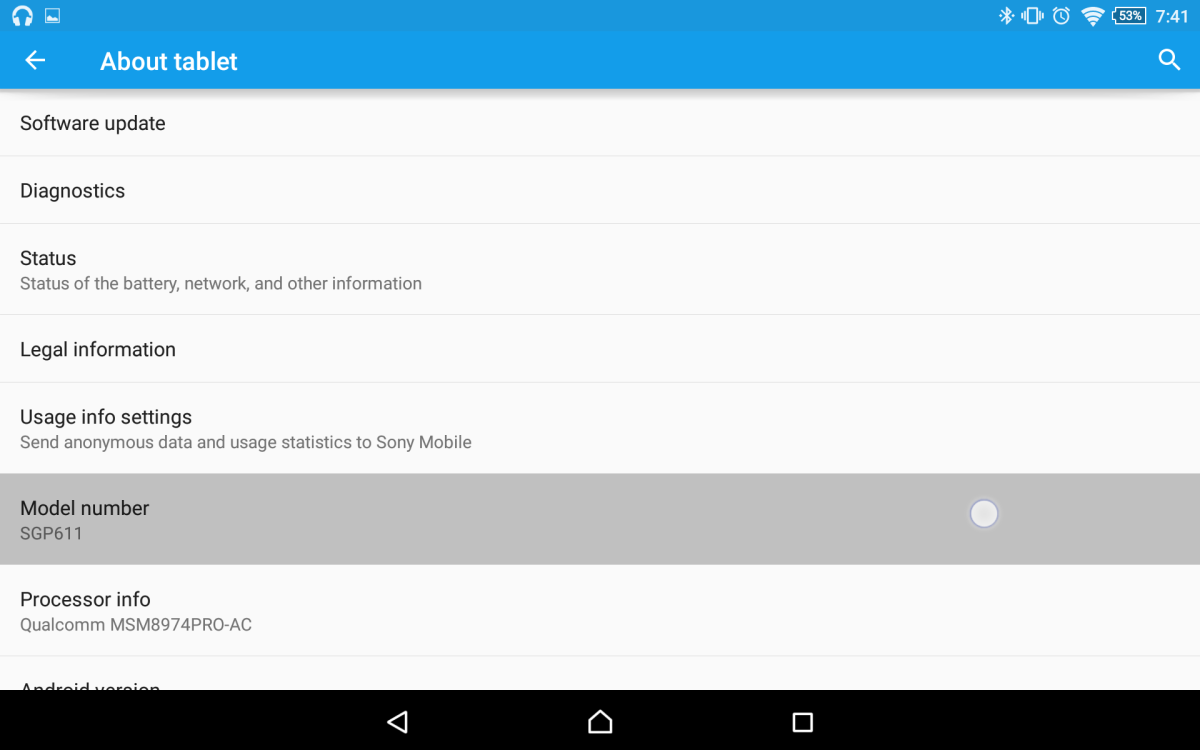
Settings -> Developer Options. If you can’t access “Developer Options“, enable it by following this path: Settings -> About Phone -> Build Number (tap on it for 5-7 times to enable Developer Options).

4) Download Motorola DROID Turbo USB driver and install it on your PC.

5) Deactivate antivirus programs on your computer

After you have finished all these prerequisites, you can forward to the rooting procedure given below.

TUTORIAL TO ROOT Motorola DROID Turbo ANDROID SMARTPHONE:

  1. Download SRS Root & extract the zip package on your computer. After doing it, you should click “SRSRoot-Setup.exe” to launch its installation wizard.

2) Choose the “Destination Location” for installing the software & click “Next“.

3) Choose “Start Menu Folder” name & click on “Install” to install the program on your computer.

4) After you have installed them, click on “SRSRoot for Android” to launch its Window.

5) Connect your Smartphone to your computer via the correct USB data cable. Once done, click on “Root Device (All Methods)” to launch the rooting process. If it doesn’t proceed, click on “Root Device (SmartRoot)” to root your device.

6) SRSRoot will need several minutes to root your device, and After it has finished, you will get a “Success” message.

Now you have successfully finished rooting your Motorola DROID Turbo Android Smartphone. To confirm root states, install “Root Checker for Android” app and confirm your device’s root privileges.SRS Root tool provides unrooting facilities too.If you would like to unroot Motorola DROID Turbo, go to SRS One Click Root window and click on “UnRoot Device“.

Generally,this device can root easily with any one-click Rooting of Framaroot,KingoRoot,KingRoot,TowelRoot and iRoot.So you can try with them.At that time you are not provided a Device drivers.

If you encounter any issues while following this guide-lines then do let me know via comments.please.Thanks.


Root HTC U11 – Unlock the Bootloader, Install TWRP Recovery and then Root

The HTC U11 is one of the best release of HTC and it works really great with Android Nougat or Oreo. This giant Android device is not compatible to be rooted with one click rooting tools, so as usual the rooting procedure comes in order like this. First of all, unlocking the Bootloader of the device, then flash TWRP Recovery into the device and the Root it with SuperSu or even better Magisk.

Just Like all other Android devices, installing a custom recovery like the TWRP is a piece of cake, once the bootloader is unlocked on the HTC U11. Once the TWRP recovery is installed well, root access can be simply achieved by flashing Magisk.zip file into the device. Why the Magisk is better than SuperSU is, for example in a situation like when you want to use the Android Pay app, Magisk will allow you to disable root access for that moment on-the-fly and let you use Android Pay unlike the SuperSU.

So, let’s get to the business…..

Prerequisites

Download Files

  • Download HTC U11 TWRP 3.1.1-0 (Americas)
  • Download HTC U11 TWRP 3.1.1-0 (Europe)
  • Download Magisk Magisk-v12.0_3 (.zip)
  • Download Magisk Manager v4.3.3 (.apk)

Unlock the Bootloader of HTC U11

See Bootloader unlocking method for HTC U11 here

Also Read, The Role of an Android Bootloader

Install TWRP Recovery on HTC U11

  1. Download the TWRP Recovery from given link above and save it in a separate file
  2. Now open a command window inside the folder where you have saved the TWRP Recovery .img file.
    (Right click on an empty space inside the folder while holding the shift and then select Open command window here from the context menu)
  3. And then connect your HTC U11 into the PC
  4. Now, type in the following command into the command window we opened to boot your HTC U11 into bootloader/fastboot mode
    adb reboot bootloader
  5. If you required for the Allow USB debugging permission dialogue on your HTC U11, just tap OK.
  6. Once the HTC U11 is successfully booted into bootloader mode, provide the below command into the command window in order to flash TWRP recovery .img into the device
    fastboot flash recovery twrp.img
    (Modify twrp.img with the name of your TWRP recovery .img file, OR change the TWRP recovery filename to twrp.img and then use the above command)
  7. Once TWRP Recovery is successfully flashed into the device, provide the below command to reboot your HTC U11
    fastboot reboot
  8. Now, you have successfully flashed TWRP Recovery into your HTC U11

Now, once after TWRP Recovery is installed, simply provide the below command to command into the PC command line to boot your HTC U11 into system

adb reboot recovery

Root HTC U11 with Magisk

Once you have successfully installed TWRP recovery on your HTC U11. You can now Root your device by using the Magisk system less interface.

  1. Download both the Magisk zip and Magisk Manager apk files from the above download link and transfer them to your HTC U11’s internal storage.
  2. Boot your HTC U11 into TWRP recovery
  3. Now in the TWRP Recovery menu click the Install and then navigate to the Magisk zip file that you transferred into your HTC U11.
  4. Once you select the Magisk zip file, just Swipe to Confirm Flash
  5. Then wait until the Magisk file to be flashed into your HTC U11
  6. Once the Magisk is successfully flashed, you will get the Reboot System option, click on it to reboot your device.
  7. Now, when your HTC U11 reboots, open the file manager app and navigate to the folder where you copied the Magisk Manager apk file earlier.
  8. And then install the Magisk Manager app into your HTC U11
  9. That’s it, now simply open the Magisk Manager app you can confirm your Root status

You would have successfully rooted your HTC U11

Read More-How to Root HTC U11

How to Root Android without Computer (APK ROOT without PC)

Kingo Android Root brings a KingoRoot apk for Android, which makes a unbelievable one-click Android root solution for Android users. It is most user friendly operation provides to root your android device without USB drivers ,USB cable And PC

Before begin into the rooting process, please make sure given requirements as below,

  • Device powered on.
  • At least 50% battery level.
  • Internet connection necessary (Wi-Fi network suggested).
  • Allow installation of apps from unknown sources. Settings > Security > Unknown Sources

Root Android via KingoRoot APK Without PC Step by Step


1.Download KingoRoot.apk.

Root Android with KingoRoot apk, without connecting to PC

The download will be automatically begun. Generally, Chrome  warns you about KingoRoot.apk while  click “OK” to proceed.

KingoRoot Apk Download, the best one-click root apk for free


2.Install KingoRoot.apk on your device.


3. Launch “Kingo ROOT” app and start rooting.

Kingo Root is most user-friendly and easy to use. Click “One Click Root” to start the rooting process.

Kingo Root Apk Main Interface


4. Waiting for a few seconds till the result screen appear.

Kingo Root Apk Rooting


5.Succeeded or Failed.

It is highly recommended that you try several times when rooting with KingoRoot apk version. We have several rooting methods integrated in apk root, however, it will only run one at a time.

Kingo Root Apk Root Succeed


If you failed with Kingo Root Apk when you can try sevaral times.Further more,if you don’t like to root your device with kingo root apk when you can root your device with KingoRoot PC version.Anyway it is most powerful android rooting tool.
How to root any Android device and version with KingoRoot PC Version?

iRoot PC For Almost All Android Devices |Free Download For Windows 8.1/10/8/7 

Those people who are using older or low-end Android Smartphones, you might sometimes can’t even install a new versions of Android App on your older devices, while installing some of the apps, you may end with an error message or a message with your device is not compatible with this version, in these kind of situations, you get really annoyed right? So, here in this blog, I’m up to provide some information about how to install all the new versions of Android Apps on your lower powering Android Device. The best way to install huge apps and get access with blocked features is to Rootyour Android device. Rooting your device is the best way for you to get access with any Android Applications.

Below here, I have provided the tutorial to Root your Android device, here I have preferred rooting your Android device with iRoot for PC V 2.0.9.

iRoot-for-windows

The iRoot tool was developed by Magyun team and they are presently supporting people with iRoot V2.0.9 version. iRoot PC version work great and provides very successive results when compare to other usual Android rooting tools, the iRoot for PC is the best among the apk and PC versions of iRoot. By using iRoot PC version, rooting your Android device really easy and safe.

When it comes to Android rooting, always iRoot takes its place in the top, as the iRoot is very famous and popular rooting tool. In this guide below, I will clearly explain completely about iRoot app and how to install the latest version of iRoot for PC.

IRoot For PC, LAPTOP, COMPUTER, WINDOWS 8.1/10/8/7 DOWNLOAD FREE

At present, iRoot tool is really very popular as it provide one click root for your Android device. The Latest version of iRoot 2.0.9 software is compatible root Android 2.2 to android 4.4 versions. With a single click you can simply root your Android device and extremely unlock more features. That’s why the iRoot is special for rooting Android. And the iRoot is totally free to download and PC. iRoot works on  windows 8.1, windows 10, windows 8, windows 7 OS.

Below you can find iRoot official download links for your windows PC, Android devices.

Follow the below Installation Steps for iRoot for PC/Laptop:

  • First of all download iRoot from the provided link

Download iRoot for PC

Download iRoot for Android

  • Now just double click on the iRoot EXE file and install it on the PC.
  • Now, it will ask you to select the specific location for the iRoot to be installed
  • Then, wait while observing the iRoot application in installing on your PC

IROOT (VROOT) FOR PC DOWNLOAD, IROOT FOR ANDROID ROOTING SYSTEM REQUIREMENTS

  1. Your PC must be running on windows operating system.
  2. You must have a USB cable with you to connect your mobile to PC.
  3. Should have updated the USB drivers.
  4. Make sure you have charged your Phone battery at least up to 70%.

HOW TO ROOT ANDROID PHONES USING IROOT (VROOT) ON PC

  1. First to begin you must have enabled the USB Debugging mode on your Android phone.
  2. Now connect your Android device with the PC (through the USB cable)
  3. Once it is connected iRoot will automatically detect your device
  4. Then just start rooting your Android device with iRoot.
  5. Wait for the iRoot to finish the process

IROOT APK V2.0.9 FOR ANDROID LATEST VERSION DOWNLOAD FREE

First you need latest iRoot V2.0.9 APK to root your android device. Now follow below APK steps for your android phone

  1. Download iRoot APK on your Android phone which you want to Root
  2. Now, you must have enabled Unknown Sources on your Android device in order to install iRoot apk on your device
    (Go to Settings > Security > Unknown Sources and check mark on Unknown Sources box)
  3. That’s it now just install iRoot apk on your Android device.
  4. Finally,you can get Results as your Android Device has successfully rooted

Above mentioned steps are the guide for you to install iRoot for PC, iRoot for windows 8.1, 10, 8, 7 laptop computer. iRoot is really a very trusted and successful rooting tool for Android devices among all the other Android rooting tools.Anyway,you can check root status using by Root Checker.

I hope you would have successfully installed the iRoot APK on your Android device using the above guide. If you get any error message during the iRoot installation process on PC or Android, then immediately let us know it through the comment section.

How to Root Micromax Canvas A1 with KingRoot

How to Root Micromax Canvas A1 with KingRoot

Micromax Canvas A1 is really an amazing Android Phone which is packed in with a 4.5 inch, Super IPS LCD capacitive touchscreen. The device is extremely powered with 1.3 GHz Quad-Core processor and a Mediatek MT6582 chipset. For a great output with the display, the device is featured with a Mali-400MP2 GPU. To join all these specs the devices comes pack with a 1 GB of RAM, as the internal Storage is 4 GB. Also, the Micromax Canvas A1 is ultimately powered with a Removable Li-Ion 1700 mAh battery.

While rooting the Micromax Canvas A1, it becomes more powerful and stunning with all the great specs. I have mentioned the guide to Root your Micromax Canvas A1 with KingRoot, as the KingRoot provides accurate Root for your device and it never harms your device at all.

Warning

Rooting your Micromax Canvas A1 with KingRoot will definitely void your device warranty

NOTE

While rooting your Micromax Canvas A1, it is entirely has to be done on your own risk.

Pre Requirements

  • Charge your Micromax Canvas A1 at least up to 70%
  • Get a complete backup of your Micromax Canvas A1.You can use Backup tool to take complete backup easily.
  • Make sure to have a stable internet connection (Wi-Fi is recommended)
  • Enable Unknown Sources on your Micromax Canvas A1
    (Go to Settings > Security and enable Unknown sources here)

Tutorial to Root Micromax Canvas A1 with KingRoot

  1. Download KingRoot on to your Micromax Canvas A1 and install it
  2. If you have not allowed Unknown Sources in the Settings, the installation will be blocked, make sure to enable Unknown Sources
  3. Once the KingRoot is successfully installed, just open it and click Try it
  4. And then click Get now to start rooting your Micromax Canvas A1
  5. Now, when the device is rooting be patience, until the KingRoot finishes the procedure
  6. That’s it, you would have successfully rooted your Micromax Canvas A1

Now you would have perfectly rooted your Micromax Canvas A1, you can check your Root status with Root Checker App, which is available in the Google Play Store.

If this method fails to Root your Micromax Canvas A1, then you can simply Root your device with KingRoot PC version. KingRoot PC version has the highest Success rate among all the other rooting tools (98% of success rate).


Root Samsung Galaxy S5 with KingRoot

Pdpkeyfeature-sm-g900azkaatt-600x600-C1-062016

Samsung Galaxy S5 is an awesome Android handset. The Galaxy S5 comes with Android 4.4 KitKat Version which is upgradable up to Android 6.0.1 Marshmallow. If you feel your Samsung Galaxy S5 is junked with unwanted applications or lacking performance with the device, you can be recovered By just rooting the device. When you are rooting an Android device, you get the ability to install custom ROMs, normally you can remove bloatware and free your mobile storage and also you can increase your Phone memory. You can also easily root your Samsung Galaxy S5 without even getting with a computer. You can free your Samsung Galaxy S5 make it awesome.

Pre Requirements

  • Charge your Samsung Galaxy S5 at least up to 60%
  • Get a complete backup of your Samsung Galaxy S5
  • Make sure to have a stable internet connection (Wi-Fi is recommended)
  • Enable Unknown Sources on your Samsung Galaxy S5
    (Go to Settings > Security and enable Unknown sources here)

Tutorial to Root Samsung Galaxy S5 with KingRoot

  1. Download KingRoot on to your Samsung Galaxy S5 and install it
  2. If you have not allowed Unknown Sources in the Settings, the installation will be blocked, make sure to enable Unknown Sources
  3. Once the KingRoot is successfully installed, just open it and click Try it
  4. And then click Get now to start rooting your Samsung Galaxy S5
  5. Now, when the device is rooting be patience, until the KingRoot finish the procedure
  6. That’s it, you would have successfully rooted your Samsung Galaxy S5

Now you would have perfectly rooted your Samsung Galaxy S5, you can check your Root status with Root Checker App, which is available in the Google Play Store.

If this method fails to Root your Samsung Galaxy S5, then you can simply Root your device with KingRoot PC version. KingRoot PC version has the highest Success rate among all the other rooting tools (98% of success rate).

How To Root Samsung Galaxy A8 Marshmallow 6.0.1


Untitled-1

How To Root Samsung Galaxy A8 Marshmallow 6.0.1

There are Four Steps to Rooting Your Samsung Galaxy A8 Marshmallow 6.0.1.

Steps Simply

1.Download iRoot

2.Install iRoot onto your PC

3.Connect Your Device-Connect your Android to your computer using a standard USB cable,Enable USB Debugging,Open ‘Developer Options’ and enable USB debugging

4.Run iRoot

Run iRoot and Wait sevaral minitues.Then,you will gain a Rooted Android Device as soon as possible.

Advantages Of Rooting with  iRoot

ACCESS MORE APPS

Generally,installation of Apps by your carrier has blocked.If you have rooted Android Device when you can install to  Enjoy thousands of restricted apps from the Play Store and other sources.

INSTALL CUSTOM ROM’S

you can Install Custom ROMs like Lineage ROM and more! You can even install the latest version of Android before everyone else.

ACCESS BLOCKED FEATURES

You have chance to access to features like, slow motion video, PhotoSphere, and NFC mobile payments as soon as they are released.

PRESERVE BATERY LIFEE

Can expand the Battery Life Easily.You cAdd 4 or more hours of battery life by installing battery-saving apps like Greenify.

FASTER PERFORMANCE

Speed up your Android device by removing unnecessary bloatware. Easily increase available RAM and CPU.

FREE WIFI TETHERING

Companies charge as much as $50 per month for Wi-Fi tethering. Rooting lets you enable tethering while avoiding costly fees.

How to Root Samsung Galaxy A8

Untitled-1

How to Root Samsung Galaxy A8

This guide below here will teach you the method to safely root your Samsung Galaxy A8. The rooting procedure is very easy and it has been even much simple with the below guide. The only thing to consider is you need to follow the guide carefully.

Samsung launched Samsung Galaxy A8 in 2015 and a new version of the device came last year with a little bit upgrades. The device has a 5.7 inch Super AMOLED display with a resolution of 1920 x 1080 pixel. It is packed in with an octa-core Snapdragon 615, powered with a 2GB RAM. The device also comes with 16GB and 32GB of internal storage, upgradable up to 128GB via a microSD card slot. The device features with 16 MP rear camera while the front-facing selfie snapper is 5 MP. The Smart Phone is enhanced with a massive 3300 mAh battery, which is great for a mid-rage Android Smart Phone. There is a fingerprint reader fixed in the home button, this makes the device even better.

If you already have a Galaxy A8 and you want to get it rooted then you have come to the right place. We will be using FramaRoot to get your Galaxy A8 rooted.

Important: Rooting will void your Device manufacturer warranty.

Guide to root Samsung Galaxy A8

Before rooting

  • Make sure to totally backup your Samsung Galaxy A8
  • Charge your Samsung Galaxy A8 at least up to 50%
  • Enable Unknown Sources on your Samsung Galaxy A8 settings

By Rooting

  • Your device warranty will be voided, has the rooting procedure is not allowed by the manufacturer
  • You can solve the above problem by unrooting your device
  • You can tweak and make many customizations with your Device
  • You can overclock the device hardware performance

Tutorial – How to root Samsung Galaxy A8

  1. Download FramaRoot from here
  2. Then Install it on your Device
  3. Open the installed FramaRoot App
  4. On the FramaRoot app interface select SuperUser in the selection and under that select Boromir exploit
  5. With this option click Root to start rooting your device
  6. You should see a pop-up once the rooting procedure is done
  7. Then Reboot your Samsung Galaxy A8
  8. Congratulation! You have successfully Rooted your Samsung Galaxy A8

To make sure that your device is rooted or not, you can check it with the Root Checker App available on the Google Play Store.

Let me know your experience, below in the comment Section